Port forwarding is necessary if you want to make your home web server accessible from the internet. It allows external traffic to reach your web server by forwarding specific network traffic from your router to your Raspberry Pi’s local IP address. Here’s a general guide on how to set up port forwarding for a home web server:
- Determine your Raspberry Pi’s local IP address: On your Raspberry Pi, open a terminal and run the following command: ifconfig (Look for the network interface connected to your local network (e.g., “eth0” or “wlan0”) and note down the corresponding IP address (e.g., 192.168.1.100).)
- Access your router’s settings: Open a web browser on a device connected to your home network and enter your router’s IP address into the browser’s address bar. This IP address is usually something like 192.168.1.1 or 192.168.0.1. Consult your router’s documentation if you’re unsure about the default IP address.
- Login to your router: Enter your router’s username and password to log in. If you haven’t changed the default credentials, check your router’s documentation or the manufacturer’s website for the default login details.
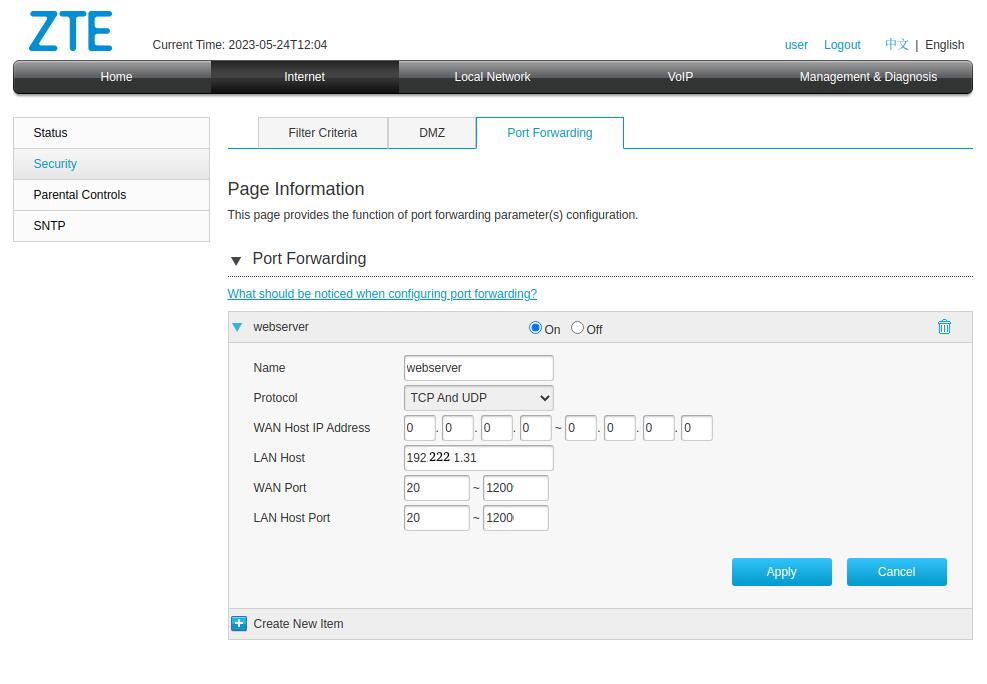
- Locate the port forwarding settings: The location of port forwarding settings may vary depending on your router’s interface. Look for options like “Port Forwarding,” “Virtual Server,” or “NAT” settings. Consult your router’s documentation if you’re having trouble finding the appropriate settings.
- Create a port forwarding rule: In the port forwarding settings, you need to create a new rule to forward incoming traffic on port 80 (HTTP) to your Raspberry Pi’s local IP address. Provide the following information:
- External Port: Set it to 80 (or any other port number you want to use for your web server).
- Protocol: Select TCP.
- Internal IP Address: Enter your Raspberry Pi’s local IP address (from Step 1).
- Internal Port: Set it to 80.
- Description: Optionally, provide a description for the rule.
- Save and apply the settings: Once you’ve filled in the necessary information, save the port forwarding rule and apply the changes. This will enable traffic on port 80 to be forwarded to your Raspberry Pi.
- Test the setup: From an external network (such as your smartphone’s cellular data or a different Wi-Fi network), open a web browser and enter your public IP address into the address bar. Your public IP address can be found by searching “what is my IP” in a search engine. If everything is configured correctly, you should see your web server’s default page or the content you have hosted on your Raspberry Pi.